Showing posts with label upcycle. Show all posts

Friday, February 15, 2013

Infinity scarf

The weather has been pretty chilly lately, and I hate being cold around my neck, so I made a bunch of casual, cotton infinity scarves. Luckily my neighbor cleaned out his closet and I got some nice color variety. Scarves are a great way to add a little something extra to a plain outfit. And these simple loops go great with T-shirts and jeans.

Today's project is:

T-shirt Infinity Scarf

You will need:
a t-shirt, extra large is best
(You can find t-shirts at thrift shops, raid your neighbor's closet or buy them cheaply in a 3 pack at Walmart)
scissors

You will cut the bottom hem off the t-shirt. Then cut about 12"  - 14" up (approx.) This should be under the sleeves.

Then holding this round loop, put your foot down on the end, and pull and stretch the top upward. Be strong!
As you do this, the fabric will curl inward, so you don't need to hem this. The T-shirt fabric will not fray.

Now you have a naturally folded loop, double it up around your neck, and voila, instant fun accessory as well as keeping you cozy.

Use the rest of the shirt for rags. Cotton t-shirt fabric is nice and soft and absorbant.

tip of the day:
Buy some Altoid mints and save those great metal tins. They are good for so many things. Small sewing notions, travel jewelry case, store cards fit in them (how do we accumulate so many of those things?). If you need a small 'wallet', use one of these tins. Your credit card, coins and cash fit in nicely plus a couple of keys (without a big keychain). Stash in your pocket and off you go!

That's all for now...
:D

Friday, February 8, 2013

bottle gift bag

I was given a bag full of fabric samples, and each one had two grommets in them. So I put my brain to work, and came up with today's project of recycled fabric...
This can be used with wine bottles, olive oil, or flavored vinegars. It's a great hostess gift

Wine Bottle gift bag
you will need:
fabric, ribbon (about 18"), sewing machine or hand stitching

The sample was the perfect size for a wine bottle. But you could use these for olive oil or flavored vinegar, etc.  But the problem was that the grommets were too close to the top.  So I folded down the top and stitched the bottom edge. Also I stitched 1 inch above this to form a casing to put the ribbon through.

Then turn it inside out, and stitch along the side and bottom. Turn inside out and then take a ribbon, add a safety pin onto the end, and feed it through one of the grommets until you come to the second grommet and come out. Pull ribbon through until the ends meet.

When you go to a friend's for dinner, or for a special occasion, put a nice bottle of wine in here, tie ribbon tightly with a bow, and surprise your hosts with a wonderful, REUSABLE, bag. Or when you go to BYOB gathering, you can transport your wine in style. White, chilled wine will stay cooler longer and as it 'sweats' the bag will help with that.

(IF you don't have samples with grommets, you can use a piece of fabric, cut 15" x 13". Fold down the top, double and stitch a nice clean edge. Fold 'right sides in' and catch a ribbon, that has been folded in half, as you sew the side seam so when you turn it inside out, the ribbon will stick out and you can tie it up that way.)

today's tip is:
keeping a package of floss in your purse can come in very handy. Not only can you keep your teeth clean after meals out, but I have needed a string to tie something with in a pinch, and floss is strong and handy.

That's all for now...
Dee

Friday, January 25, 2013

Zip it!

I had a super great Christmas! Hope you did too. I got to spend the holidays with my girls and their guys, and we crafted, played games, watched non-stop Harry Potter, ate, drank and were very merry!

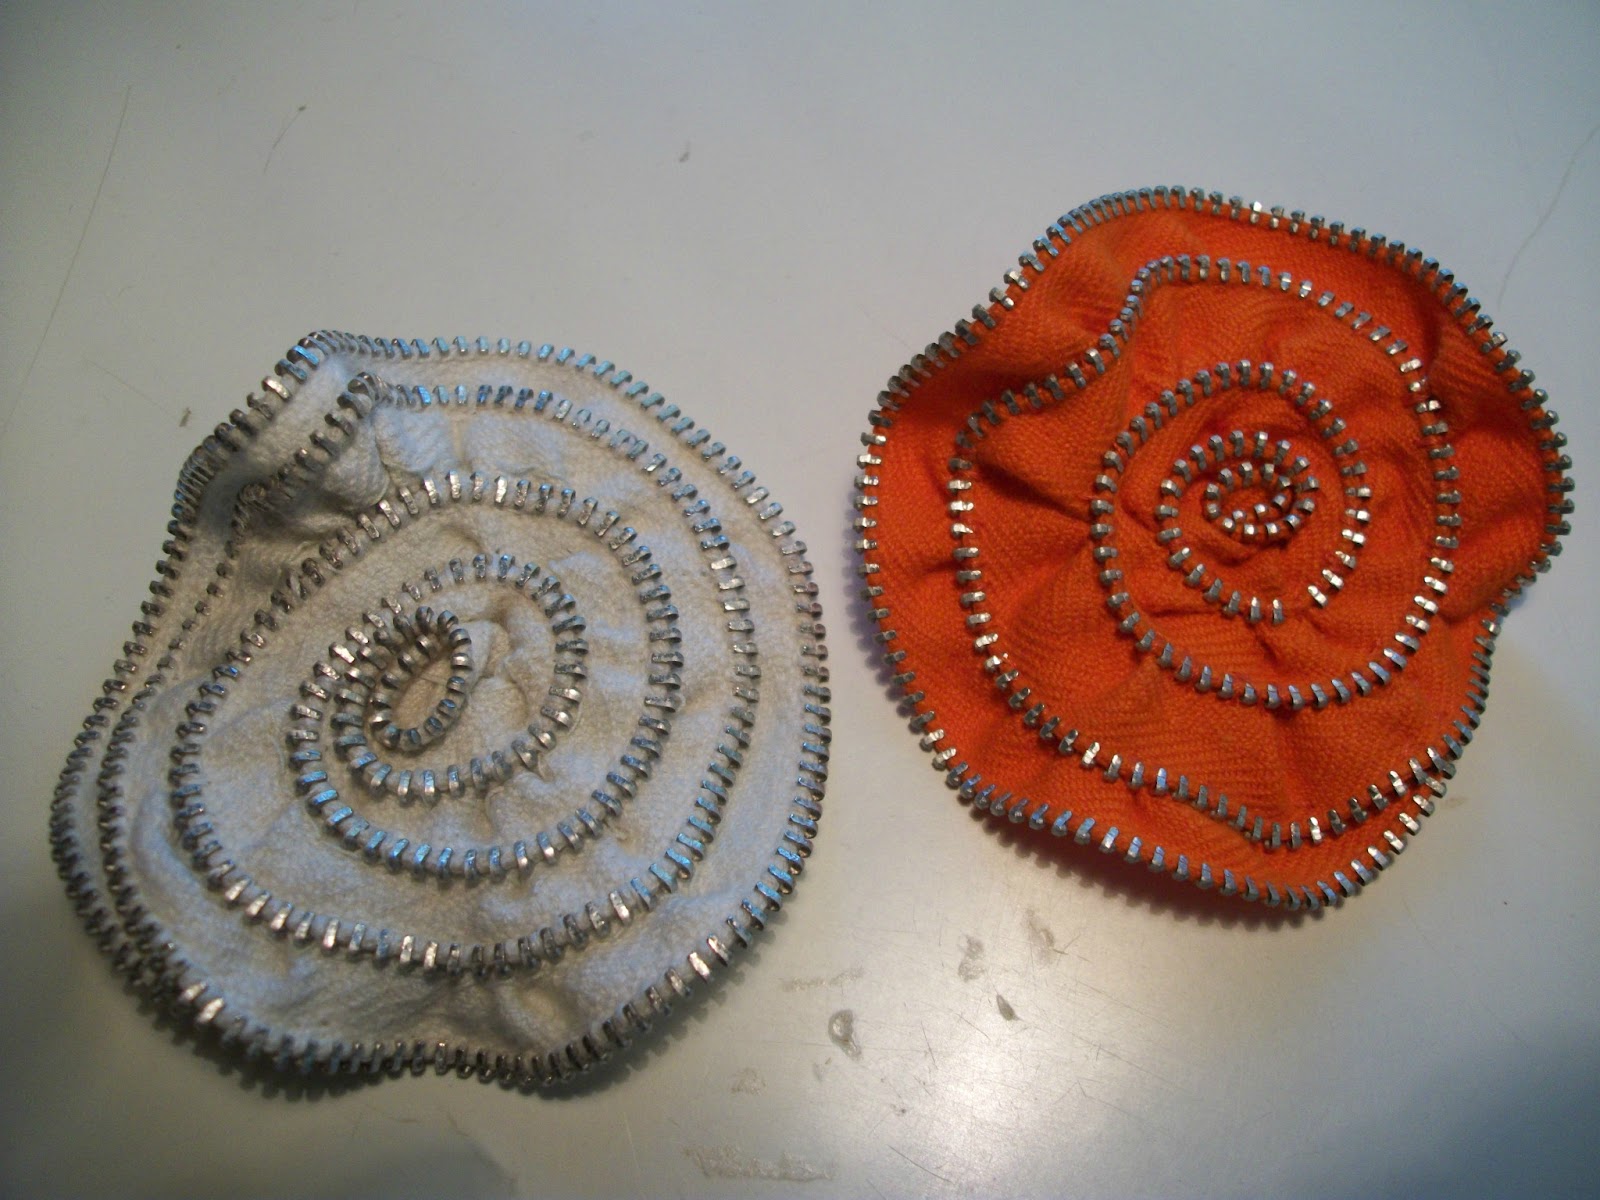
I received some fun new books for Christmas and one of the projects in there was this zipper flower. I have made a few, and added a pin to one, and a barrette to the other.
These are projects for the HAND sewing persons. So those of you who don't have a sewing machine can also make fun 'sewn' projects...
Today's project is:
ZIPPER FLOWERS

You will need a needle and thread and zipper (about 18") used/reused or new is fine. (I prefer the recycled) You can find zippers at thrift shops or off old clothes. Just cut it out!

white flower underside shows stitches
 
1. Unzip the zipper, so you only have one side. With the 'teeth' up, start winding and sewing from the bottom as you turn. the zipper will create it's own shape as you go. Keep stitching and gathering until you get to the end of the zipper.

If you want a pin, get a pin back and stitch it to the bottom. If you want a barrette you will have to get a barrette and stitch it to the bottom. If you want it on a purse or tote, just hot glue it down.

tip of the day:
I hope you have saved some of your Christmas cards this year. Cut one into a long rectangle, punch a hole and add a string/yarn/twine/jute and use as bookmark. Since you might have received some books for Christmas!
Also you can cut a few small squares out of the cards and punch a hole in the corner, add a string or ribbon and use for next year's gift tags.

That's all for now!
Dee