I have a favorite pair of jeans that I wear all the time. And unfortunately they have finally started to rip. Now I know, the rip and holes and frayed parts of jeans are popular right now. In fact, you buy them with the worn out parts already made. That's not for me. I tried wearing them with the long rip in the knee for a week, and couldn't get used to it.
So I am going back to the 70's
(in fact, fashion repeats itself every 20 years, so all this stuff if back 'in')
I had a pair of jeans that had so many embroidered designs on them, it was hard to find the denim.
Just kidding, but really hand sewing and embroidery are making a comeback. So today's project is right in time for...the time!
today's project is:
Embroidered jeans
Whether the rip is long, or wide or small, you can camophlage the area with a cute embroidered design. Mine was a long rip, so I chose a long stemmed flower to cover up the opening.
You will need:
embroidery thread, needle, scissors
When you buy the thread, it comes in 6 strands. You usually would separate this into two 3 strands each. If you slowly separate the threads (with the main unit squeezed between your knees) slowly pull the parts apart. Then thread the 3 strands onto the needle (with a larger eye) and knot the end (thread should be about 18").
Starting from the inside of the rip, work your up grabbing each side of the rip as you go keeping your stitches close to each other.
If you run out of thread, knot inside the pant leg. And then start again until you have the opening covered. Be creative, use vines, birds, hearts, flowers, whatever! It is so much prettier than a gaping hole in your jeans!
tip of the day:
use your dryer sheeet to clean out the lint trap. This is important as too much lint build up can start a fire! eeks!
that's all for now....
Dee
Showing posts with label stitched. Show all posts
Friday, February 1, 2013
Friday, January 25, 2013
Zip it!
I had a super great Christmas! Hope you did too. I got to spend the holidays with my girls and their guys, and we crafted, played games, watched non-stop Harry Potter, ate, drank and were very merry!
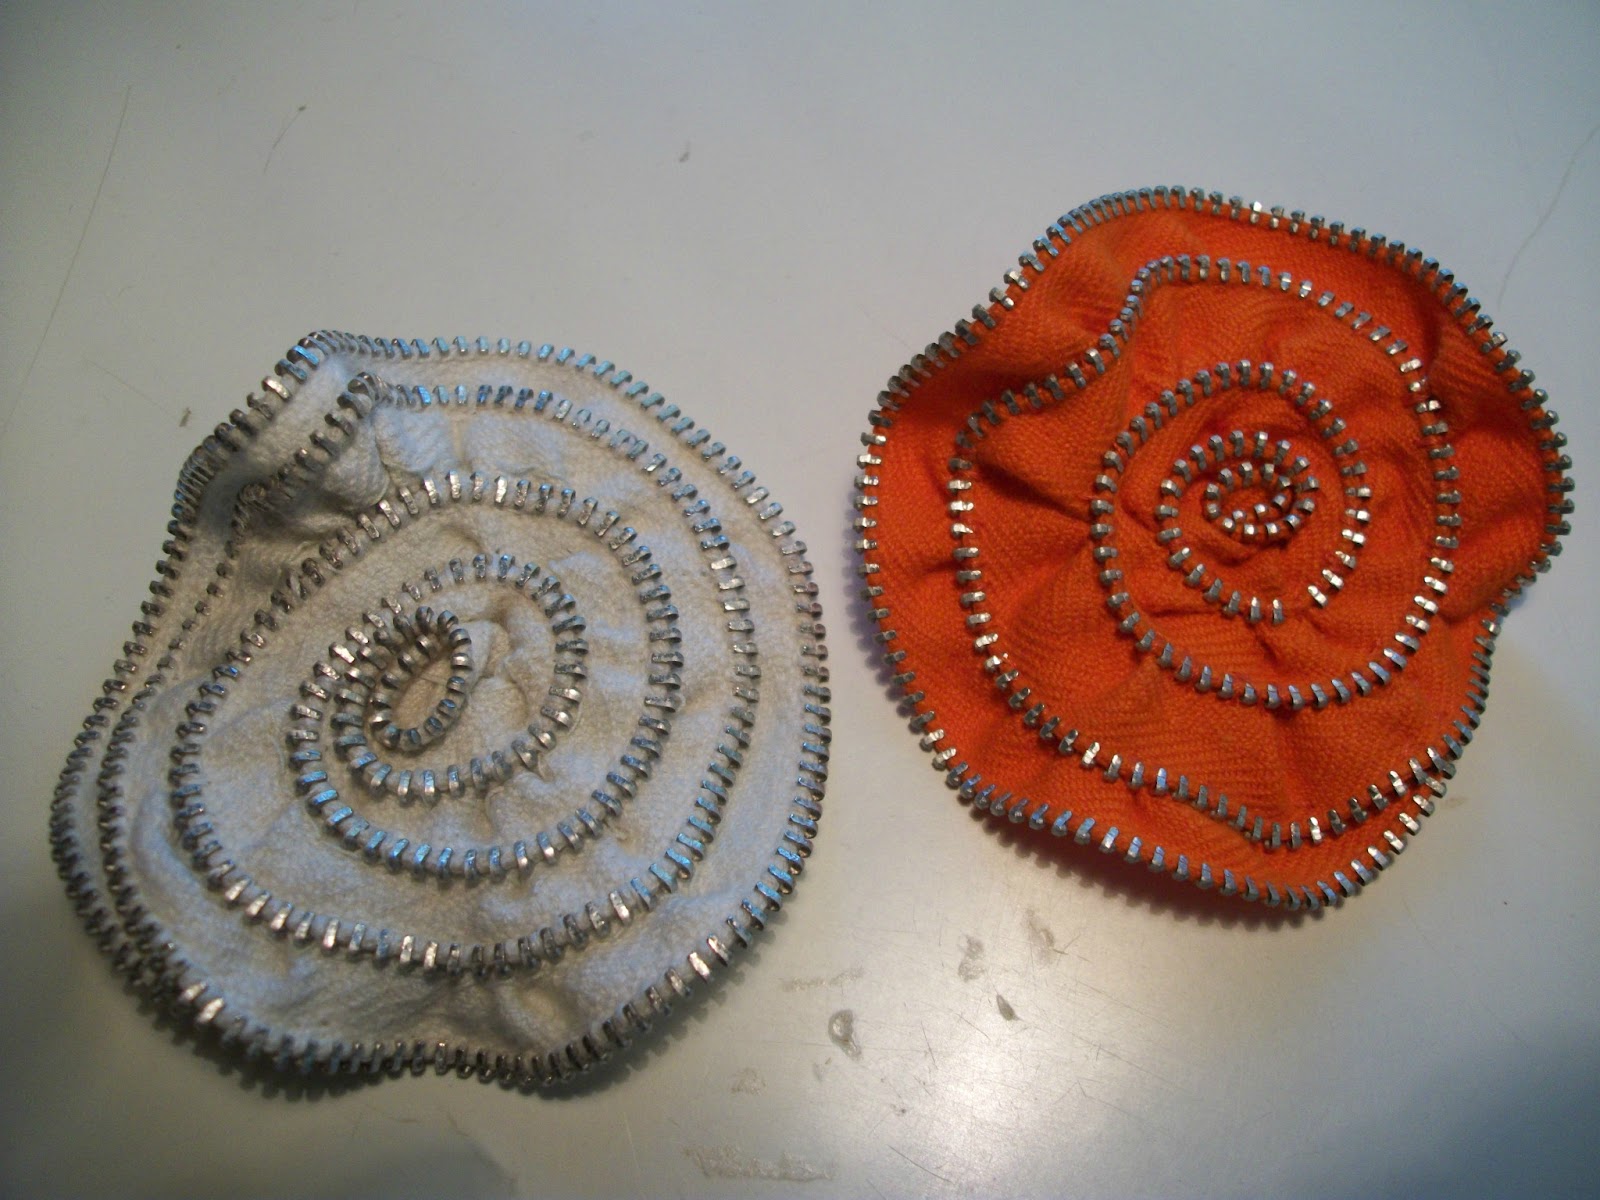
I received some fun new books for Christmas and one of the projects in there was this zipper flower. I have made a few, and added a pin to one, and a barrette to the other.
These are projects for the HAND sewing persons. So those of you who don't have a sewing machine can also make fun 'sewn' projects...
Today's project is:
ZIPPER FLOWERS
You will need a needle and thread and zipper (about 18") used/reused or new is fine. (I prefer the recycled) You can find zippers at thrift shops or off old clothes. Just cut it out!
1. Unzip the zipper, so you only have one side. With the 'teeth' up, start winding and sewing from the bottom as you turn. the zipper will create it's own shape as you go. Keep stitching and gathering until you get to the end of the zipper.
If you want a pin, get a pin back and stitch it to the bottom. If you want a barrette you will have to get a barrette and stitch it to the bottom. If you want it on a purse or tote, just hot glue it down.
tip of the day:
I hope you have saved some of your Christmas cards this year. Cut one into a long rectangle, punch a hole and add a string/yarn/twine/jute and use as bookmark. Since you might have received some books for Christmas!
Also you can cut a few small squares out of the cards and punch a hole in the corner, add a string or ribbon and use for next year's gift tags.
That's all for now!
Dee
I received some fun new books for Christmas and one of the projects in there was this zipper flower. I have made a few, and added a pin to one, and a barrette to the other.
These are projects for the HAND sewing persons. So those of you who don't have a sewing machine can also make fun 'sewn' projects...
Today's project is:
ZIPPER FLOWERS
You will need a needle and thread and zipper (about 18") used/reused or new is fine. (I prefer the recycled) You can find zippers at thrift shops or off old clothes. Just cut it out!
| white flower underside shows stitches |
If you want a pin, get a pin back and stitch it to the bottom. If you want a barrette you will have to get a barrette and stitch it to the bottom. If you want it on a purse or tote, just hot glue it down.
tip of the day:
I hope you have saved some of your Christmas cards this year. Cut one into a long rectangle, punch a hole and add a string/yarn/twine/jute and use as bookmark. Since you might have received some books for Christmas!
Also you can cut a few small squares out of the cards and punch a hole in the corner, add a string or ribbon and use for next year's gift tags.
That's all for now!
Dee
Subscribe to:
Posts (Atom)