Friday, January 25, 2013

Zip it!

I had a super great Christmas! Hope you did too. I got to spend the holidays with my girls and their guys, and we crafted, played games, watched non-stop Harry Potter, ate, drank and were very merry!

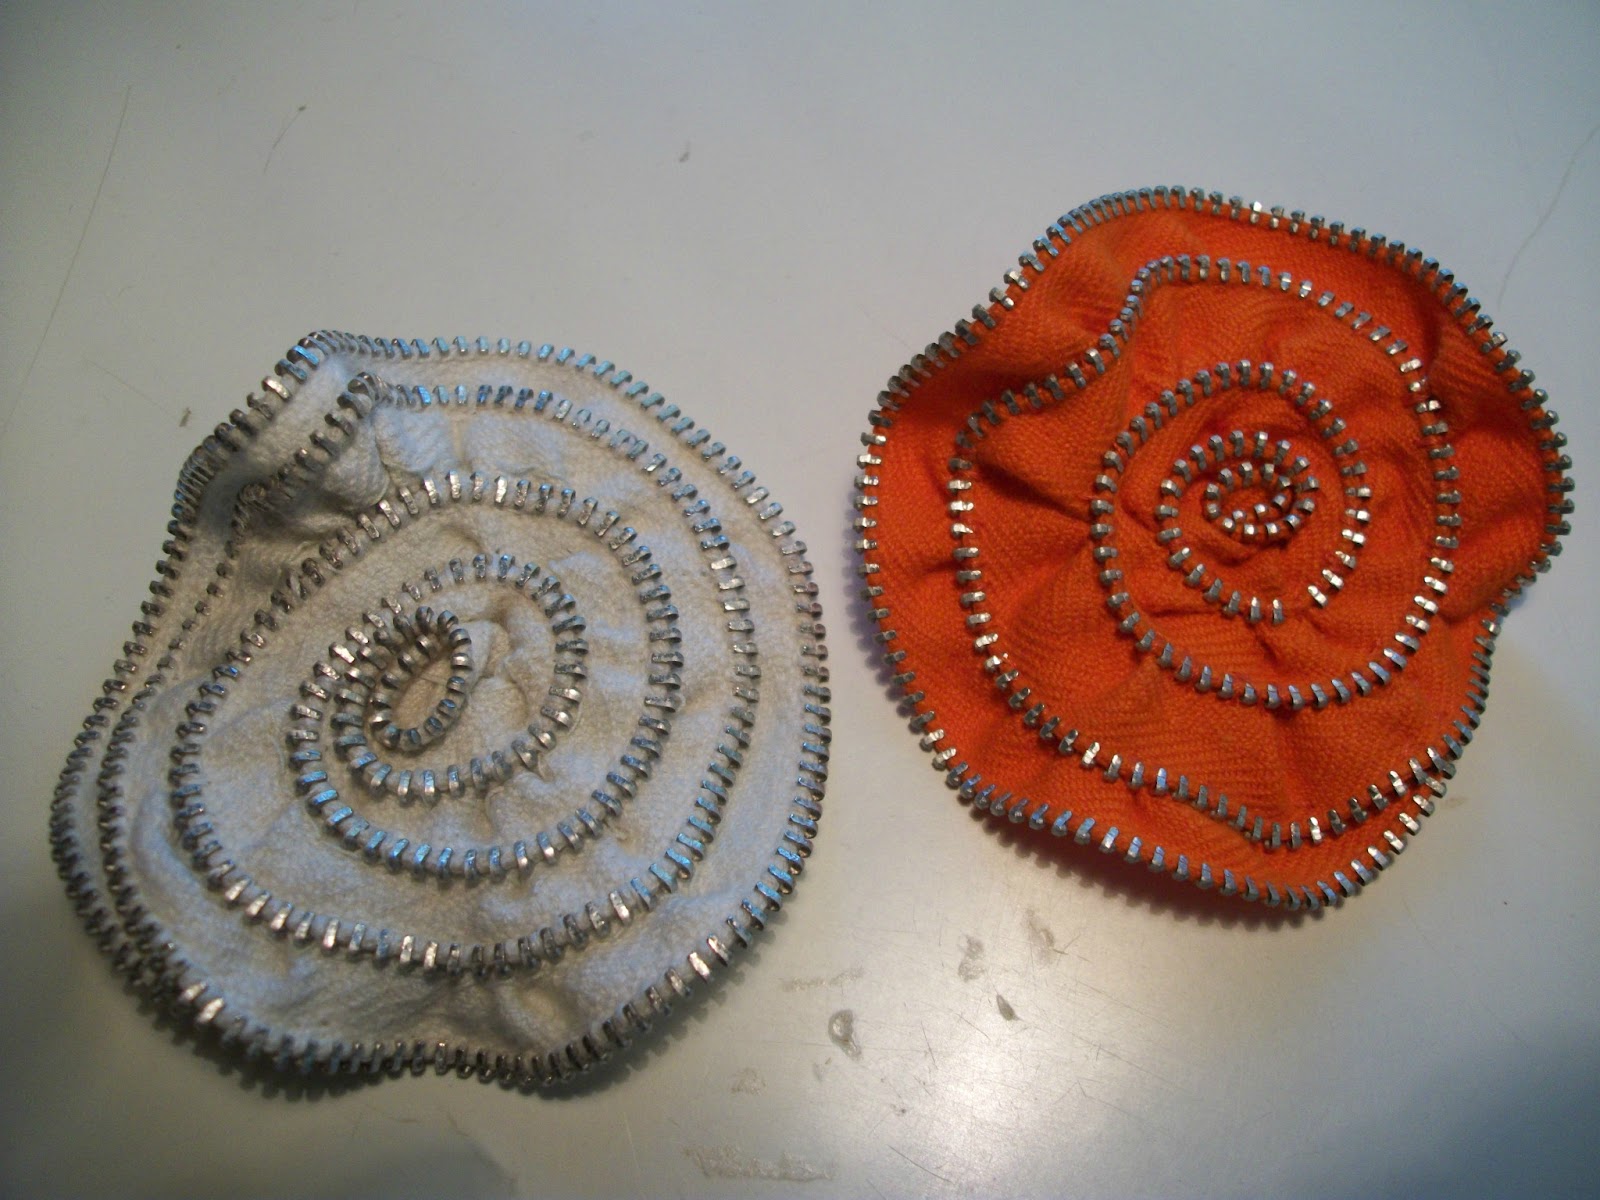
I received some fun new books for Christmas and one of the projects in there was this zipper flower. I have made a few, and added a pin to one, and a barrette to the other.
These are projects for the HAND sewing persons. So those of you who don't have a sewing machine can also make fun 'sewn' projects...
Today's project is:
ZIPPER FLOWERS

You will need a needle and thread and zipper (about 18") used/reused or new is fine. (I prefer the recycled) You can find zippers at thrift shops or off old clothes. Just cut it out!

white flower underside shows stitches
 
1. Unzip the zipper, so you only have one side. With the 'teeth' up, start winding and sewing from the bottom as you turn. the zipper will create it's own shape as you go. Keep stitching and gathering until you get to the end of the zipper.

If you want a pin, get a pin back and stitch it to the bottom. If you want a barrette you will have to get a barrette and stitch it to the bottom. If you want it on a purse or tote, just hot glue it down.

tip of the day:
I hope you have saved some of your Christmas cards this year. Cut one into a long rectangle, punch a hole and add a string/yarn/twine/jute and use as bookmark. Since you might have received some books for Christmas!
Also you can cut a few small squares out of the cards and punch a hole in the corner, add a string or ribbon and use for next year's gift tags.

That's all for now!
Dee

Tuesday, December 18, 2012

Santa napkin holder

So here we are, the time is speeding by. Christmas is right around the corner, and we are frantically trying to get everything done.
STOP and take a breath. We need to enjoy this time of year. Instead of getting crazy, get happy!
Make a list, check it twice. Not to see who is naughty or nice, but to check that we are not forgetting anything. Then sleep peacefully and wake to another fun day of getting ready for the most fun time of the year!
I made these cute napkin holders that I told my guests that they were welcome to take home as gifts. Simple and easy and quick. You can make a ton and give away. My mom gave me the pattern and the supplies which I just found hidden amongs my other Christmas stuff this year as I was searching for something else. Thanks mom, we love you and miss you, but are carrying on many of your traditions for this time of year. xoxoxoox

Today project is:
Santa Napkin Holder
you will need:
white felt
pink felt
red pompons
green sequines
red napkins
tacky  glue
(Again, I'm very frustrated about my pictures getting tipped over.
ArG!)
Anyway, The strip across the top is 7 inches. and the bottom of the beard to the top of the strip is about 6 inches.
So make your own pattern, the beard is not an exact science. Then cut a hole for the eyes and nose.
You will glue the pink square behind the 'hole' for the eyes. Use Tacky Glue, it works best.
Then glue eyes and nose onto the front.
Then when dried, bring the flaps together in the back and staple it together.
Slip a red napkin into the back and VOILA you have a cute santa napkin holder.
 
tip of the day:
When you get Christmas cards, rip off the return address label from the envelope, that way you have a record of who sent you cards. You can then make sure those people get a card from you.
 
Happy Christmas preps....
:D


Friday, December 7, 2012

Post Thanksgiving


What a wonderful Thanksgiving we had...
Driving up to Seattle is a long way, but so worth it.
Having my girls together and their guys, and us was so much fun.

Justin outdid himself on the cooking.
And Betsy outdid herself on the decorations. Here are only a few of the fun things she made:
a nice card using real feathers


A Mayflower nut holder and feather mobile. Unfortunately, my pix are sideways!
 (Can't figure out why flipped over. So just turn your head to the right...)
 
So you can see how adding those special little creations around make a big impact on your holiday entertaining. And it's fun to do !!
 
Now we are all getting ready for Christmas. Hopefully that holiday will be as much fun as this one was!
Tip of the day:
Think about recycling your Kleenex boxes for those gifts like cookies and sweets.
Just cut off the tops and put tissue paper inside, and fill with yummies. The pretty designs on the boxes won't need any more wrappings.
:D

Tuesday, November 20, 2012

happy Thanksgiving

Well, it's that time again...
The year has zipped by, where were we?? So many things have happened this past year.
Life has brought us to the holidays, and are we ready? I am! (hee hee)
Sorry, not to gloat, but I've been stashing away gifts and looking forward to this time of year, for 11 months.

I love Christmas...everything about it (except snow and cold).
I love thinking about others, what they might like, I see things throughout the year, and buy goodies or better yet...make things (when I hear a hint about what my dear ones might like).
I love to looke forward to the look on their faces when they open a gift that is especially made for them.
And the funny thing is, I end up with more than I thought (sort of life's 'lay away').
But that's okay. Here it is Thanksgiving. So many activities surrounding the holidays, and so many crafts to try. Every magazine has tons of ideas, recipes and things to do.

Today's project is a simple one that focuses on the Thanksgiving table. A simple napkin holder. But creating an addition to the festivities is always fun. This picture is just plain cardboard. YOU have to find that special paper with special prints to accent your table.
LEAF NAPKIN HOLDER

Find double sided card stock, or use a gift box (you get from the dollar store) and glue decorative paper on the plain side.
Draw and cut out the  1/2 leaf shape onto each end of a long rectangle. Make sure you cut the two slits (on opposite sides) to connect the ends together. When you attach the ends, it will make a maple leaf. (right now, it looks like a spiky dachshund with two heads, ha ha)

This is a fun, quick and funtional craft that adds a handmade touch to the holiday dinner.
That way you are contributing to the day, even if you are not the chef!

IF you are traveling, be safe! Have fun and stop every once in a while, breathe and enjoy!!!!

tip of the day:
Soup is great this time of year. And most of the leftovers you have from dinner, can be combined into a great soup. V-8 is a great base for soup, add some chicken broth and throw in the veggies and turkey pieces.  Freeze it for future frosty days. (remember to leave 1/2" space in the container for freezing bloat.). We might not eat so much, knowing that our yummy leftovers will be enjoyed later.
HAPPY THANKSGIVING!
:D


Friday, November 16, 2012

What's cookin' Good Lookin?

Thanksgiving is coming. That means cooking. The only holiday that is solely centered around FOOD. And what we are thankful for. And I guess that's food and our loved ones to share it with us. We are planning our menus, our shopping, our guest list, our activities. It seems to be the forgotten holiday, between Halloween, that has become so huge and people don't take the skeletons down til February, and Christmas, which starts in the stores the day after Halloween. Sheesh.
At any rate....
The project of the day is~
A Manly Manly apron, from a man's shirt for our favorite man who is cooking for Thanksgiving!
 
You will need:
 a man's shirt (large or X large is best) Get a nice one from the local thrift shop.
scissors, and sewing machine
 
You will be cutting the back off the shirt, leaving the collar. From the extra fabric you will cut two straps for the waist ties.
 
Hem the edges, fold and sew the two side ties and attach to the side of the apron.
And voila, you have a cool apron any guy will be happy to wear. A hawaiian shirt would be fun to use, or any funky 'guy' print.
You can use the extra fabric from the back of the shirt for future (or past) projects.
 
Tip of the day:
If you eat too much on Thanksgiving, and have that "way too full" feeling...sleep on your right side. Because that eases the stomach, not stresses it.
 
That's all for now!
:D


Friday, November 2, 2012

Rainy Day Art

Hey,
My apologies to my loyal readers for my absence lately.
So many things have been happening that I neglected you, and I am sorry for that.

After a big wedding, and traveling back to the Midwest, and various visitors, and then we visiting, and then the death of my beloved little cat, several craft fairs and just day to day stuff, I'm feeling like time has zipped by, and I want to get back into my routine. 

Does that happen to you? Time seems to speed by when you sit back and take a breath and tell yourself  "don't worry about it, relax, don't stress about keeping on a schedule".  And before you know it...
not just days, but WEEKS have passed and you kick yourself in your butt (yes, you can do this), and you take the time (and it REALLY doesn't take that long) to do what you need to do.... you fill in the blanks (whatever YOU need to do)...write, create, compute, communicate, relate, interact, organize.

I want to encourage you to take 1/2 hour a day to do those chores you don't want to do, but need to do. Then smile, and take on the rest of your day. You can do it, and I will be there with you doing it, too.

My project for today is:
PAINTED UMBRELLAS
You will need:
an umbrella
acrylic paint
brush
hair dryer

First, get online and look up your favorite artist. I have used 3 artists: Matisse, Van Gogh and Monet.

If you are not confident in your artistic ability, pick an artist whose art is not precise. Such as impressionists, abstract, etc.

Paint onto the umbrella, and when it is dried, blow the hair dryer onto it to set the paint. This will make it waterproof. Nothing like having your umbrella drip paint in a rain storm, ugh.

This is not only pretty, one of a kind, handmade, recycled, but functional. EVERYONE can use an umbrella, right? And if it doesn't turn out just right, who cares? Art should be fun, instead of signing the artist's name, sign your own...That way...it's yours, and will always be just RIGHT!
Did you ever see a Jackson Pollock? He splattered, dripped and blobbed paint on. Go for it!

Hey, how about getting a kid to paint it? What a great gift for a parent to use something their child did.

tip of the day:
Winter is coming and with that comes dry skin. Try using Vaseline instead of expensive lotions. If you wear running shoes or gym shoes, and get dry feet, slather on the Vaseline, then white cotton socks. After your workout, or walk, you'll have softer tootsies. Also a little on your hands will help with dry, chapped fingers. Spas use stuff like this, then slap on mittens and sockies and let it soak in. So why not you?

That's all for now...
:D
Saturday, August 25, 2012

Cat-titude

 
I have a cat. It was my daughter's cat that she rescued back in 2002. We never knew how old she was. But Dana discovered that her landlord said "no pets". Sooooo, I ended up with her. Her name is Taavi. Which is a name that Dana learned from a book of Estonia tales, that her grammy gave her. But as it turned out, this female cat ended up with a 'boy' name. Because Taavi means David.
 
Anyway...we had several cats at the time, and she did not get along with any of them. So she ended up inside, and the others were exiled outside. This princess attitude (Cat-titude) fit her perfectly, and she has been the one and only ever since.
 
Now Taavi is getting very old. She is our only pet now. She's lost weight and when you pet this 'purr machine', you can feel every rib. It's becoming clear that her life is coming to an end. She wants attention constantly, doesn't have much energy, and hides in corners. This makes us very sad, but she has had a good life. But saying goodbye to 'ANYONE OR ANYBODY' has been a tearful, terribly sad situation for me and I am crying now just thinking about it.
 
So this post is for our sweet kitty, with an attitude.
Today's project is:
 
SOCK KITTIES with attitudes.
 
You will need: kid socks, stuffing, needle and thread, and embroidery floss.

As you see in the picture, the cat's muzzles are the 'heels' of the socks. and their legs are the 'opening' of the socks.  You will need to machine stitch or hand stitch legs.
 
Turn the sock inside out. Cut a curve shape above the 'heel'. Sew two leg shapes from the opening. Cut the legs apart. Then stitch the top (head and ear) closed.  Now cut a small slit under the muzzle to allow you to turn the sock right side out.

Stuff the sock and stitch closed the opening. This part I embroider over with pink thread in a heart shape. Thus you have no obvious stitched closure.

Now is the fun part. Making the attitude of the kitty by sewing arms that will end up in pockets.
Take white thread, and stitch through the sides of the kitty. Each one will end up differently. That's the great thing. They have their own personalities. Stitch black embroidery thread for a face. and any color for pockets.

I use an extra long needle for easier sewing through the bodies.

tip of the day:
While I was facing painting at our local community picnic, I got three spots of green paint on my white linen shirt. Egads, I tried everything to get it out. But to no avail. So I resorted to my secret weapon...White Out.  Yes, I put a drop of white out on the spots, and it covered them beautifully. I have washed this shirt several times, and this crazy stuff has never come off. (So what does that tell you if you accidentally get it on other stuff...don't!)

That's it for now...
:D